Irrigation Control Valve – Diagnosis & Repair
Irrigation Control Valve
Component Description – An inline device that is opened and closed remotely by the irrigation controller to deliver water to an underground piping system.
Problem – Valve is not functioning properly- will not turn on
Quick Fix – Make sure the water supply has been turned on.
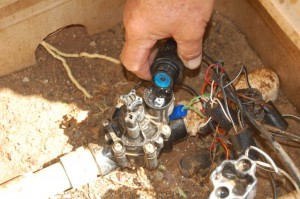
At the valve, check all wire connectors and splice connections. Look for frayed or damaged wire and repair. With the water shut off, remove the solenoid and inspect for any debris that may impair its operation. Be careful not to lose the plunger or small spring inside. When the solenoid receives a small electromagnetic impulse from the controller it is pulled into the upper part of the solenoid, opening a small hole in the valve body. This allows the transfer of water from the chamber above the diaphragm to the downstream side of the valve and the valve opens. With the solenoid removed have the valve actuated from the controller. If the solenoid is still good, the plunger will retract and you will hear a clicking sound. Loosen the screws on top of the valve and remove bonnet. Inspect for any debris. Replace all parts, turn water on and actuate valve again.
Problem – Valve is not functioning properly- will not shut off
Quick Fix – Turn off the water supply at the backflow preventer or water meter.
Follow same procedure as above.
Diagnosis – If the valve still does not actuate or the solenoid does nothing.
The solenoid is defective or worn out.
Diaphragm is worn out.
Repair Remedy – Replace solenoid. Take solenoid and write down type and model number to bring to irrigation parts store.
Remove top of valve and replace solenoid and diaphragm at the same time. It may be more economical to buy a new valve and just replace the whole top of the old valve.
Keep valves out of the dirt for ease of future repair.

